Requirements
So, what were the requirements for this build? Like most rifles in the tactical world these days, I wanted to be able to get .5 MOA for accuracy, but probably would have been happy with .75. But that wasn't it. I also wanted to be able to make it a custom rifle, allowing what ever caliber a user wanted, different barrel lengths, stock options, colors, etc. In essence, a rifle that was a custom rifle. The price, for the rifle, needed to come in under $800 after adding up all the custom pieces. Of course, you are going to have to offer up your labor free of charge in order to keep it under the set $800 limit. Really, there were not too many more "requirements" than that.
The pieces
Okay, we need something to start with, the core of the rifle, the receiver, or action. Because this project is intended to be built by most anyone and it needed to be affordable, the perfect fit is the savage action. They are very easy to work on (component based) and more importantly they can be head spaced with the lock ring, which allows for a completely finished barrel to be built and shipped without us needing any finish reamers, etc. But, a problem with the current crop of savage rifles is that they really are not THAT cheap like they used to be, and most all have the accu-trigger, which is nice, but more money, and not exactly what I wanted. Luckily for us, Savage wanted to introduce a low priced rifle again a few years back and came out with the Stevens company and the Stevens 200 bolt action rifle. The Stevens is a savage 10 & 110 action (depending on the cartridge that is chambered) without the accu-trigger and using their own stock. The bolt is also marked "Stevens". The retail cost of the Stevens 200 is around $350. One was ordered up in .30-06

The next, and very critical piece, is the barrel. Obviously the rifle had a light thin barrel, and of course we want the custom part of choosing our contour, chambering, twist, length, etc, so a new barrel was in order. Now, we normally use MT Rifleman barrels for our other rifles, but the cost would be too high for this project. I have tried Adams & Bennet barrels before with pretty good success, but they are not "as custom" as we need for this project. Now, I had been to the ER Shaw web page before, www.ershawbarrels.com and they looked worth trying, and the price was about $145 shipped for whatever length, twist, contour and caliber we wanted. Their web page was well laid out and so I placed my order. I ordered a 24" long barrel in the same contour as the savage varmint barrels. I ordered it chambered in .30-06 with a 1:10" twist. Why the .30-06? Well, I have enough 308 rifles and I wanted something a little "different" but still needed access to match ammo to do a good accuracy test. So .30-06 it was. I ordered it with a rough finish to hopefully help the metal finish color stick. This was the slowest part of the build, as the wait was about 8 weeks. The initial quality seemed to be pretty good on the barrel when it did arrive, and everything fit just fine.

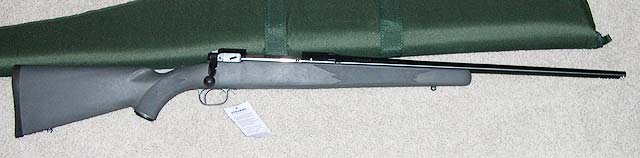
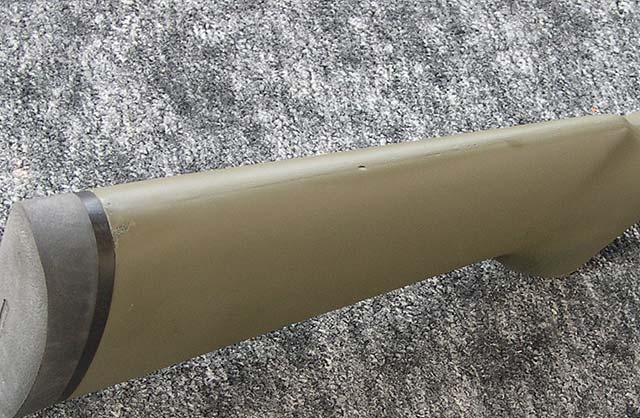
The last big piece of the rifle is the stock. This too is a critical piece because it is the user interface between the operator and the part that sends the bullet down range. So it needs to be comfortable, functional, and still provide a solid and good bedding area for the action. While looking for stocks on brownells.com, I came across a series of stocks offered by Brownells that looked to have some good shapes and were affordably priced. You can see them here: Brownells Stock Page. I elected to try out the "woodchuck" version as it looked to have a good shape and fill all the requirements that I was looking for. So I ordered one. When the stock arrived, the shape was actually pretty nice and I liked it... on the other hand, the quality was pretty poor. Here are a few pictures:
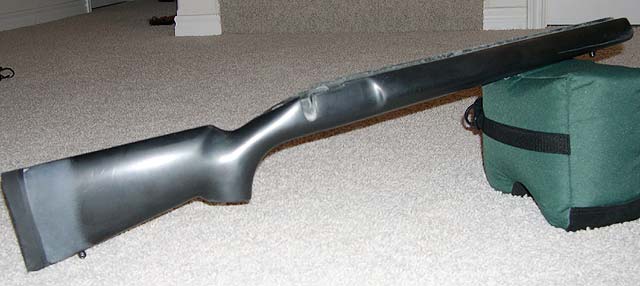
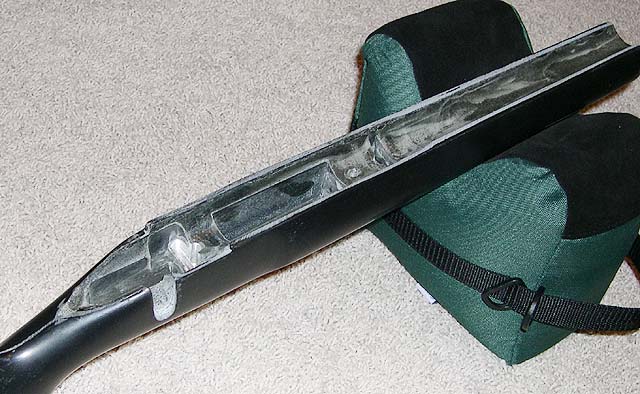
The biggest problem with the stock was the really poor finish quality. The shape was nice, the strength appears to be good, but there are severe mold lines and major chips that would require hours of filling and sanding to make really nice. For the same money, I would recommend stocks from either Bell & Carlson or Choate. Both of which are about the same price, but with far superior finish quality. If you do not like the available colors on those two makes, you can paint them the same way as I explain below with this stock. I was very disappointed with the quality of the construction of this stock... You can head to midwayusa.com or brownells.com that both sell the B&C stocks and Choate varmint and sniper stocks. Again, I highly recommend either one of those manufacturers over the stock I got. Both will still keep the budget under our $800 limit.
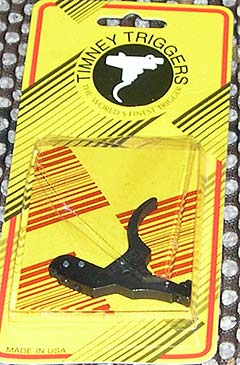
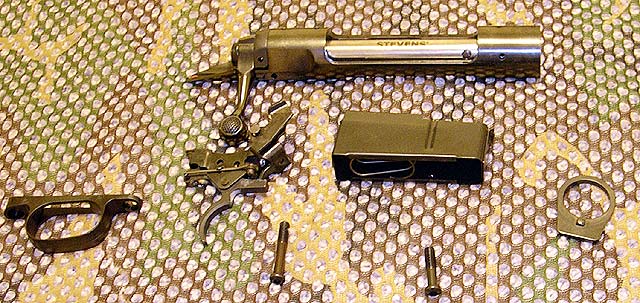
There were a few more parts and pieces that I wanted to make the rifle nicer and still would keep us under the budget. One of them was the trigger. The factory Savage and Stevens trigger are "okay" and are adjustable, but it is really not the greatest. Timney makes triggers for the savage actions which run about $80. You can order it here: Timney trigger. Here is a picture of the one that arrived here:
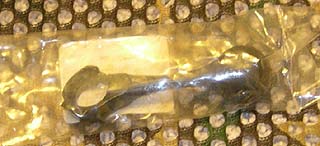
Another part I wanted to replace was the funny looking bolt knob. I originally wanted one of the sharpshooter supply tactical bolt knobs, but they were on backorder for months so I just ordered one of the factory large bolt knobs made by Savage. I ordered it from Brownell's and it was only $15 or so. The Sharpshooter one has since become available again. Here is the one I picked up:
So that pretty much takes care of the parts and pieces for this rifle build.
Assembly
The first thing you need to do is disassemble the rifle, this is fairly straight forward process. First and foremost remove the bolt, which will guarantee the rifle is unloaded and safe. Start next by removing the stock which is simple by loosening the two screws on the bottom of the stock, and then removing the third small screw that holds the back of the trigger guard in place. Once you have the stock removed, its time to remove the trigger mechanism and magazine box. The trigger mechanism is removed because we'll be painting the action and we do not want to paint the trigger mechanism. The mechanism is removed by driving the two pins out that hold the mechanism to the action using a hammer and punch. You then need to fish the mechanism out with the safety attached. It is not difficult, just take your time. You will also need to remove the box magazine with I usually do by using a flat blade screwdriver and some creative twisting and prying. Generally it can be done with no damage, just don't get crazy. I'm not sure why savage started mounting the boxes the way they do now.... but oh well.
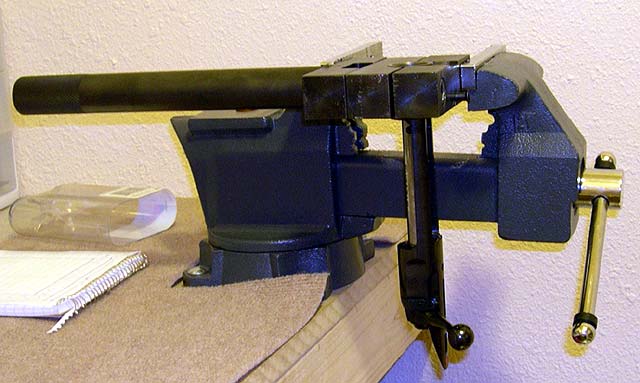
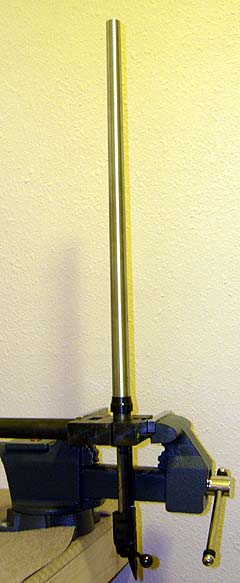
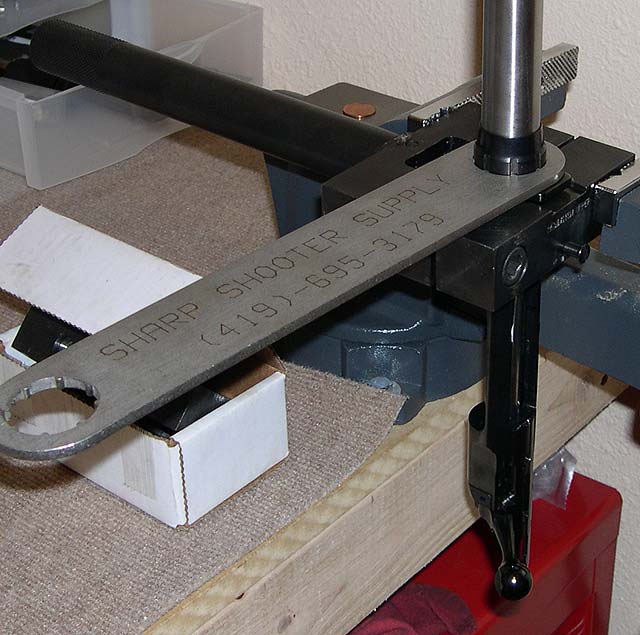
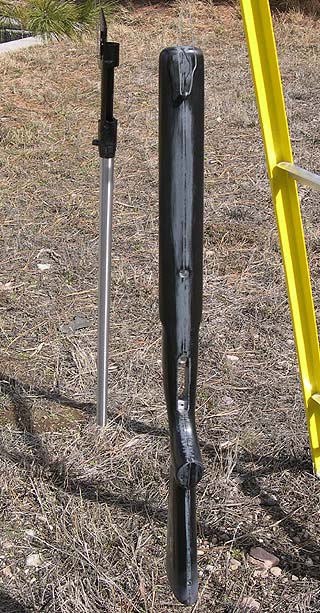
Once you have the box and trigger off, its time to yank the barrel. In order to do this, you will need to mount the action in either an action wrench, or some other method to solidly mount it up near the recoil lug. If you have a Remington 700 action wrench, you can use that, and this is what we did. Be sure to clamp or mount that action up near the recoil lug to prevent any twisting of the action. The action wrench is the preferred way, but it can cost money. I'm contemplating offering the use of our wrench to anyone in exchange for "anything shooting related" like ammo, unit patches, or use your imagination. So if interested, shoot me an email. Once you have it mounted in the wrench, you then need to mount it to something firm; a bench vise is good for this. You then need to loosen the barrel nut, this is done using a specific wrench for the job. The wrench we have is made by sharp shooters supply and is available for "use" for the same terms as mentioned above for the action wrench if one is interested. It usually takes a good yank on the nut, or the use of a longer breaker bar to break it lose. Once lose, thread it up, and then the barrel will twist out of the action. Now that you have the barrel off, your collection of parts will look like this:
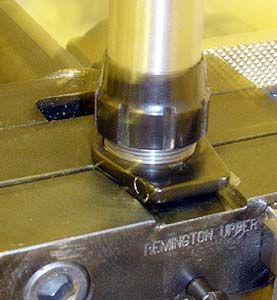
Notice the recoil lug, be sure to hang onto that. I elected to try out the factory recoil lug even though this is one of the areas one would start with first to get a little better accuracy. The factory lugs are not precise, and a good Taylor or other make recoil lug would be far superior. But again, I wanted to see what was achievable with the factory one first before replacing it.
Okay, we have the rifle into pieces now, and all our new parts on hand... let us start putting everything back together. If one were going to square the action face, true the threads, lap the lugs, or perform other action work, this would be the time to do it. But these are more advanced things to do, and this project was intended for the DIY home shop guy... so we did nothing to the action, no accurizing or truing, etc. It'll be interesting to see just how accurate this rifle would be.
So, first things first... let us put the barrel on! Having the action mounted in the action wrench, and clamped in the vise, we have our starting point... and it looks like this:
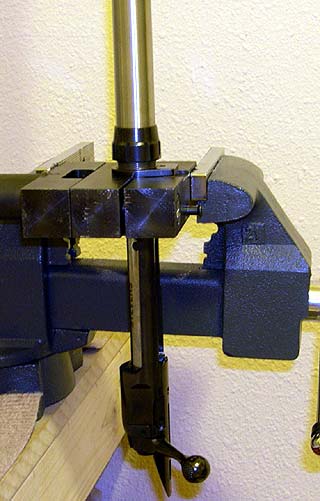
Let us now put the nut on the new barrel, and thread it as high as we can. Like this:
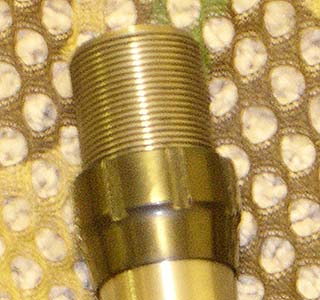
Now, be sure to put the recoil lug on the barrel. If you are using the factory lug, or a replacement with the alignment detent, this makes life easy. Thread the barrel into the action and slide the lug onto the action with the little knob into the detent in the action.
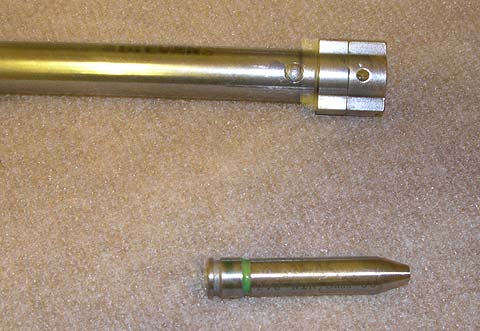
Now, everyone needs to realize that headspacing is CRITICAL, especially if you value your health and the health of others. With excessive headspacing, your rifle can explode... that is not a good thing. The headspace is measured using a headspace gauge for your caliber, or with the Savage actions, you can use a fired brass case that came FROM THIS RIFLE. A handloaded dummy round can also be used. What ever you use, be safe (i.e. don't use a live round!!), I used a head space guage, as I have a few of them and had one for.30-06. These can also be "borrowed" like the above mentioned tools.
The way you do it is to take your bolt with the headspace gauge in the bolt and put them in your action, pushing it all the way forward and dropping the bolt as if chambering a round. Now, thread the barrel down until it hits up against your head space gauge. The thing that many people consider is one of the big reasons why Savage rifles are so accurate is because you can get tight headspacing which is good for accuracy, and we wanted a nice tight headspace. So, I would pull the bolt up, then threaded the barrel in slightly more and then dropped the bolt back down. I did this until there was slight resistance when dropping the bolt, giving me a good tight chamber and headspace. Now it was time to lock everything into place by tightening the barrel nut. I simply threaded the nut down to the recoil lug, and then put the nut wrench over the barrel and prepared to tighten it. If the barrel is allowed to rotate while you are tightening the nut, it can affect headspacing. Some white out used to make an indication mark can work to show if it rotated. I elected to just check the headspace after I tightened it with both the go and no-go gauges, which I did, and everything checked out fine, and the barrel & headspacing job was done. The bolt should drop on the go gauge, but not drop on the no-go gauge.
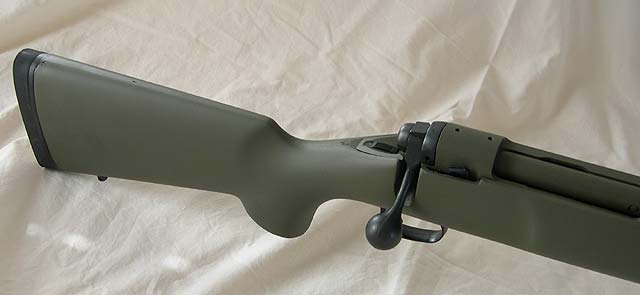
Free floated barrels are considered to be a key for accuracy, and I agree to this thought. I took the barreled action and mounted it in the stock. The stock was inletted from the maker for a varmint barrel contour, and the fit was actually good. I bolted the action down and checked the free floating of the barrel by slipping an index card between the barrel and stock and slid it all the way to the recoil lug.
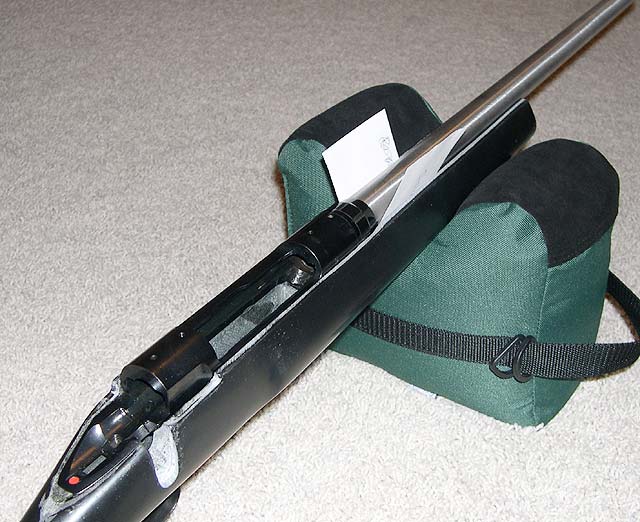
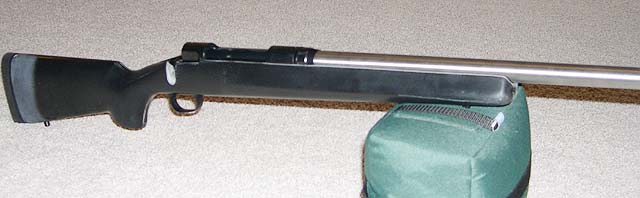
This was the first look at what the rifle kind of looks like... so I took a picture:
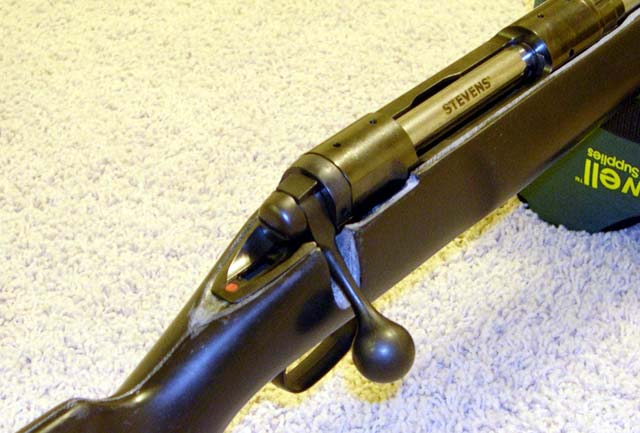
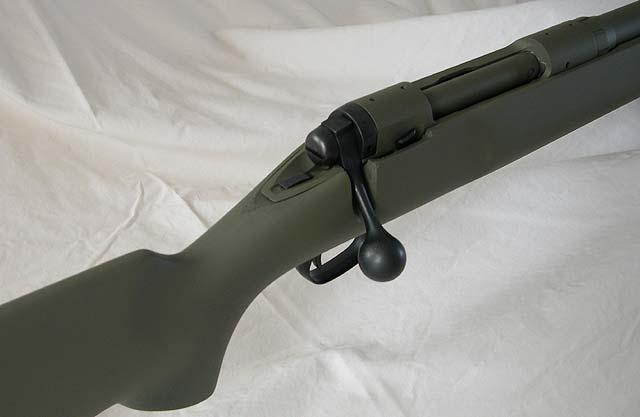
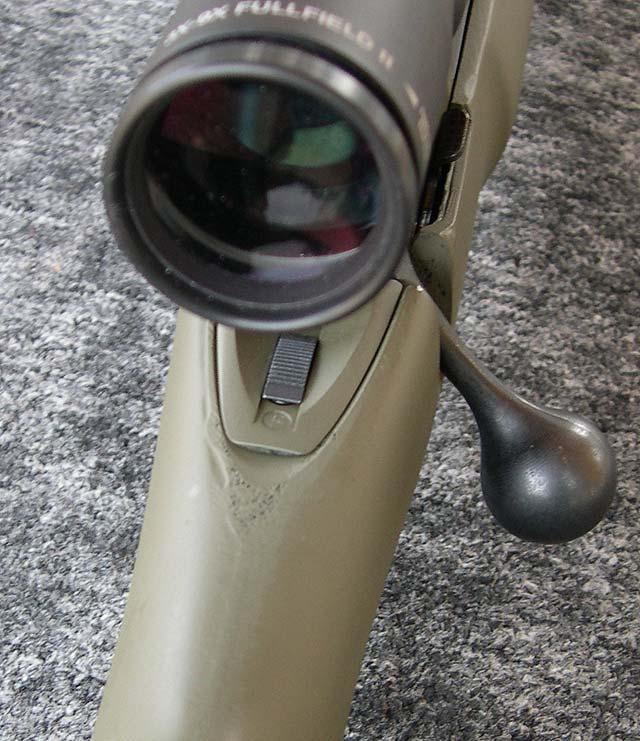
We were now getting close to the paint job, and I needed to replace the bolt knob with my new one. With the savage, it is an easy job. Simply find the right allen wrench, mount up the bolt, and unscrew it. I put some protection around the bolt, mounted it in the vise, and then needed to use a breaker bar (well, the sharpshooter supply barrel nut wrench) to give some extra leverage to get it to losen, but this was no problem.
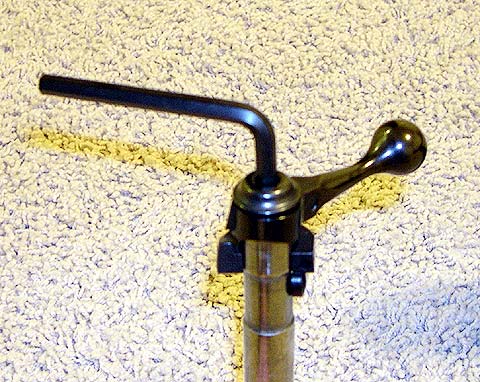
I then put on the new large factory bolt knob and tightened it up. Now, you may notice in the picture belwo that the screw on the back of my bolt is not an allen. I used an old style Savage bolt screw because it was deeper and it looks better to my eye... that is all. It offers no other advantage.
Well, at this point we were ready for finishing the stock and the metal work. Now, this was intended to be a custom rifle, so, that means custom colors! I like green guns, so I elected to make this one green. The finish I wanted to use needed to be simple to apply and not require baking, as barreled actions will not fit into 97% of the kitchen ovens out there, making baking products like teflon impractical to the average builder of this rifle. So, for this project, brownells alumahyde was selected.
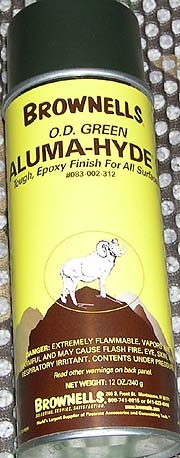
Alumahyde offers a good selection of colors, supposedly good durability, and easy to apply. The preparation of the fiberglass stock was easy, after sanding down some of the mold lines on the stock I just provided a good cleaning with soap and water, then hung it up without touching it. I hung it with wire from a ladder outside on a good warm sunny day (alumahyde should be applied in 70+ degrees). The metal work, on the other hand, is more labor intensive in order to do it right. Sand blasting is best, but may not be available to some builders. So, a good amount of sanding with sandpaper, perhaps 150-200 grit on all the metal will do pretty good. I say this after having done none of that on this rifle. This was done as an experiment, as I wanted to see how Alumahyde performed on the various amounts of metal preperation. The alumahyde adhered very well to the fiberglass and the rough blasted barrel, but not well at all to the smooth bolt and action. Actually, the action area has held up only because it hasn't been treated bad yet, but some field work will probably cause some easy scratches. But like I said, with some roughing up of the metal it does well.
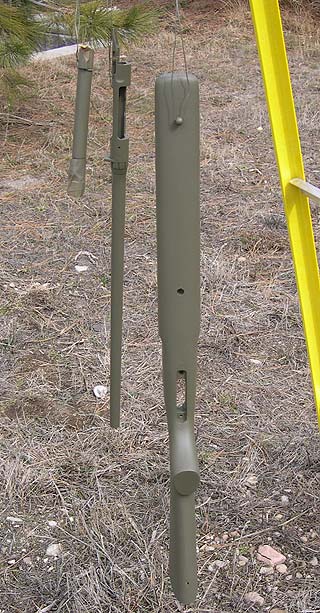
The alumahyde is applied using a spray can and went on fairly smooth without any real problems. I put on about 3 coats and that seemed to provide good coverage, and was more than was really needed. I then let it air dry for 30 minutes and then moved them indoors to let cure for about 4 days. They say 48 hours is enough, but I waited as long as I could to try and help durability. I did not paint the large bolt knob, as I tend to like a little bit of contrasting colors on my rifles instead of one solid color over everything. I also removed the recoil pad from the rifle to let it stay unpainted and black.
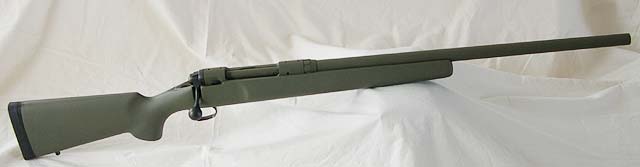
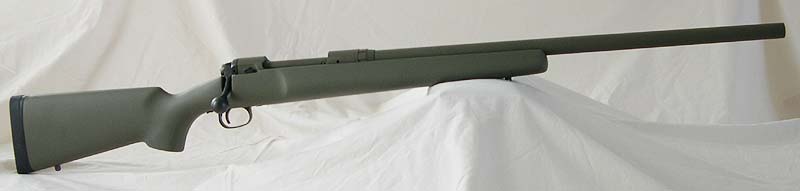
With everything colored and painted, it was time to put it all back together (always my favorite part as you see it come together for the first time). The magazine box requires a little persuasion to get it back on, and then putting the trigger back on. The Timney trigger requires putting the base of the trigger mechanism back on and then following the provided instructions which has the installation and adjustment instructions. It adjusted very well with no take up or overtravel. It is a simple trigger, but works surprisingly well. I made sure to do some slam tests and dropped the rifle on its butt once assembled to be sure the safety worked in all conditions. With all the barreled action back together, it was time for finally assembly of the rifle. You probably have noticed that I never mentioned glass bedding. The stock has aluminum pillars and a tight inletting around the action area, so I thought I would try it out without glass bedding first to see how it does. Here is another recommendation: git a better trigger guard. They are not expensive, and I managed to crack the factory plastic one around the front screw when I was putting everything together. With all the pieces assembled, it didn't look too bad. Here are some pics:

Here are some pictures of the flaws on the stock. There were more, but these were some of the worse ones.
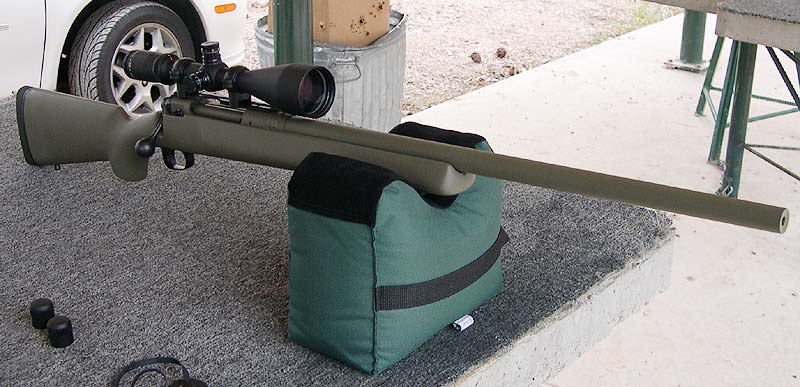
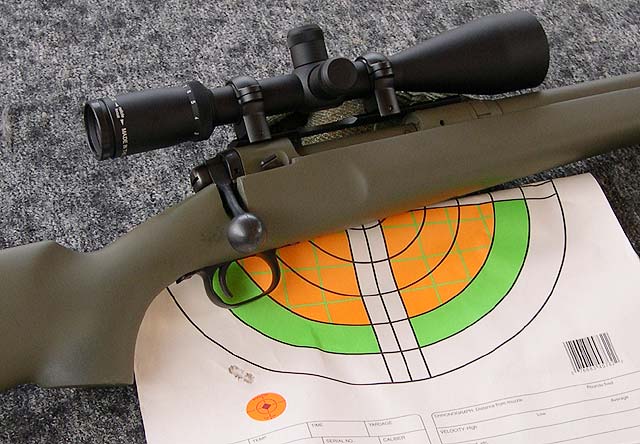
Well, the moment of truth was upon us. It was time to mount up some optics and take this thing out to the range. I had just removed a Burris 3-9x50mm fullfield2 scope from another rifle a few weeks earlier and I thought this would make a good combo with this rifle. So I put on a cheap (keeping to the theme of the rifle) one piece b-square weaver style base and then some nice Burris rings. I used the good Burris signature rings because I was reviewing them for another write-up. Everything went together without a problem and here are a few pictures from the range.

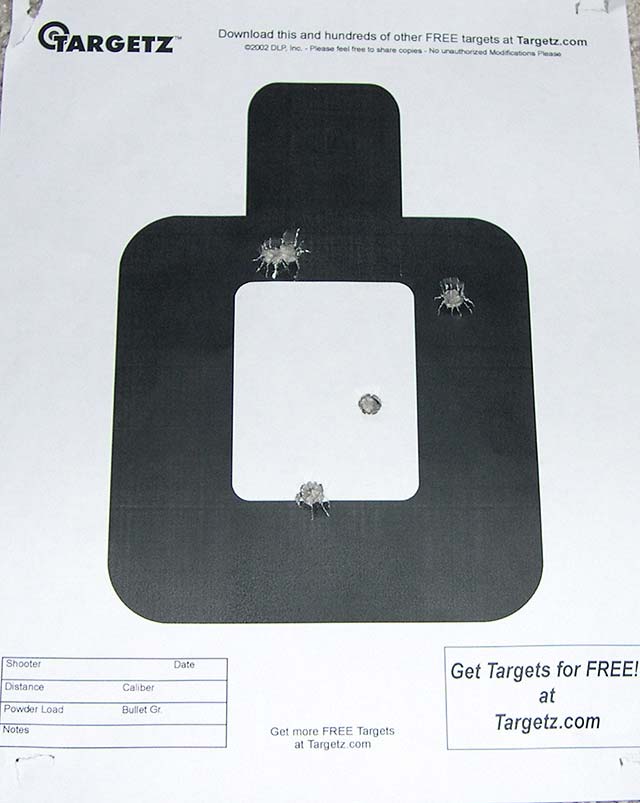
At the range, I did the initial zero with surplus ammo from the CMP. The bolt was slightly stiff when chambering a round, which I expected with the tight chamber we strived for. After bore sighting, the first round was on paper and we then proceeded to zero. Accuracy with the surplus ammo was not very good, about 1.5 - 2.0 MOA. At this point I thought I would have to do some additional work to get the rifle shooting to where I wanted it. I finished 16 rounds doing a light break in. One thing I noticed while shooting was that recoil was not bad, which I'm sure was aided by the heavy rifle and the decelerator pad that came standard on the stock. Another thing I noticed is that the cheek piece area of the stock is thin, and not that comfortable, but overall; the platform was stable when fired and certainly functional. The scope was also not ideal for good group shooting, as the crosshair reticule on the ballistic-plex reticule is a bit fat on a 9x scope and covers a lot of area on the target. I then broke out the federal Gold Medal Match 168gr ammo to do a real accuracy test. I immediately noticed that chambering the GMM provided no resistence when closing the bolt. The first group was right about .8" with two rounds going through the same hole. Hum... now things were looking better. So, I made some adjustments to the scope (the rounds were hitting about 3" lower with the match ammo) and settled in to concentrate on firing a good group. The next group had all three rounds touching and measuring .45". Not bad at all. Pretty good in fact, I was happy. The rifle shot right around there with the next group. I then moved a target out to 300 yards and fired the current SC postal match competition target. The wind was blowing pretty well from 10-15mph with gusts a bit higher. I also did not adjust the scope, I simply used the marks on the ballistic-plex reticule, which was actually right on at 300y. But the large stadia wire was even more pronounced at 300, so accuracy was affected. I fired a 5 round group, and was pleasantly surprised it maintained 1 MOA with a 3" group. With good weather and good scope, it would do MUCH better. All in all, very good performance for the rifle. Here are some pics.
And the 300y group
Well, in conclusion, the rifle performs as well as I could hope! Here is the breakdown of the pricing
$350 - Stevens 200
$150 - Barrel
$150 - Stock
$15 - bolt knob
$80 - Trigger
$30 - Misc
$775 - Total
This has been a fun project... though I'm not really sure what I'm going to actually do with the rifle. I think I'll zero it with the surplus ammo and use it as a fun mid range plinker. I think all the goals were achieved and I call the project a success. If you have any questions, please feel free to contact me.