The goal of this project was to get a semi-custom rifle built by the average person for close to $800. After doing a quick calculation, I decided I better give us an extra $50, because I couldn't find out a legitimate way to do it with a NEW action for under $800. Certainly some money can be saved if you hit the local pawn shops or gun shows to find a used Remington 700 action. But I wanted to use a brand new one just for bench mark reasons. Of course, I would like to see good accuracy and some amount of customization in caliber, barrel length & contour, and with the stock. So, with those simple goals in mind, I set out gathering components and doing some research to get the project rolling.
Requirements
The requirements consisted of building the rifle for under $850, use a Remington 700 action, and to get good accuracy. For the accuracy performance I set specific goals. First, it had to be more accurate than the original rifle we started with; and second was that it needed to shoot sub .75 MOA with factory match ammunition. The caliber was not important but it ended up being a .308, the standard sniping caliber. The last requirement was that it needed to be accomplished without using tools and equipment that the average shooter would not have or know how to us, and the project had to be safe. With a Remington 700 action being required, this changed many things in the build.
For those of you that do not know, putting a barrel on a Remington 700 action is not as simple as screwing on a new barrel with a head space gauge like we did on the Stevens/Savage action in the sub $800 build. It requires a lathe and or a reamer with a short chambered barrel. These tools are not what an average shooter has in their garage or know how to use. So, there will be no barrel mounting here, we'll have to have someone do it for us. Let me state this clearly right now, DO NOT JUST SCREW ON A NEW THREADED BARREL ONTO A REMINGTON ACTION AND SHOOT IT. With incorrect head spacing, the rifle will literally explode and WILL cause bodily harm or death. I hope that is clear enough. With that taken care of, let us continue.
The pieces
Obviously, the first piece has to be the Remington 700 action. If you are going to buy a new action, as we did in this case, you have a choice to make. You can either purchase just the action from either Brownells ($339 clearance) or Midway USA ($399). Of course, in order to order an action online you would need an FFL, and it appears that both Brownells and Midway will no longer be carrying Remington actions on a regular basis. So your best bet would probably be to head to your local gun shop and buy a Remington 700 SPS. Do not worry, chances are it will be cheaper to buy the entire rifle anyway. The rifle comes with the magazine box, follower, magazine spring, floorplate and recoil lug. All of which you would have to buy along with the action and would set you back another $100+. You should be able to find a 700 SPS for around $450 brand new, or possibly even less. Some have been seen for as little as $400. For this project, a loyal SC member asked if I would be willing to do the build on his rifle (a remington 700 SPS in 308) and that sounded good to me as I did not need another 308 tactical! He purchased his SPS rifle for $410 and I used that figure in the budget.
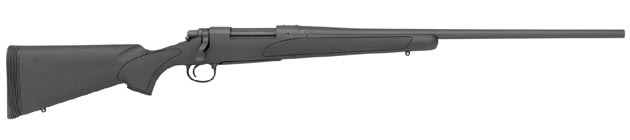
Remington File photo of 700 SPS
So, now we have the action, we are going to need a stock and a barrel. These decisions are somewhat related because the stock needs to be inletted in the barrel channel to fit the barrel. In terms of the barrel, we are on a tight budget, and we are going to have to have the barrel mounted, which is an additional cost. In order to stay in our budget, we really only have one choice, E.R. Shaw Barrels. This is the same barrel maker that we used on the sub $800 Savage build, and if you recall, we were able to get good sub .5 MOA accuracy with it. So that decision was made, now it was a matter of finding a stock that we liked and a barrel contour that would fit nicely.
I knew we would be over $400 for the action and over $200 for the barrel, so the stock would have to be well under $200 in order to stay in our budget, and we still had some small items we would need. So, browsing the midwayusa and brownells web sites again, I came up with a short list of stocks that would work, and presented them to the owner to help decide. The owner was very interested in thumbhole stocks, and that was fine. The list included the following:
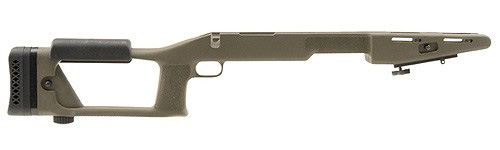
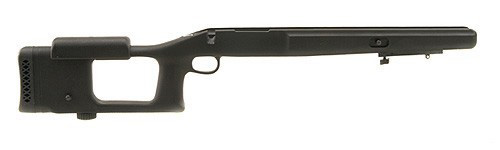
The Choate Ultimate Sniper for $175. The aluminum V block is fine, but the design and style didn't do anything for us. These stocks are popular and are fairly well made and rugged. Though they are heavy and perhaps a bit too over built.
The Choate Ultimate Varmint stock for $175. This has the same aluminum block as their sniper stock and is just as rugged, but the design is much more pleasing to my eye.
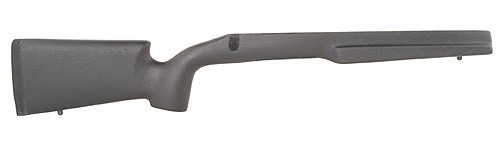
Bell & Carlson Tactical stock for $150. The B&C stocks seem to be gaining some momentum and are decently made. This one does not have their aluminum bedding block, but appears to be a nice design. It wasn't a thumbhole but was still a possibility.
Boyds laminated drop in thumbhole stock for $198. The design is nice, but it was not synthetic and the price was pushing the limits.
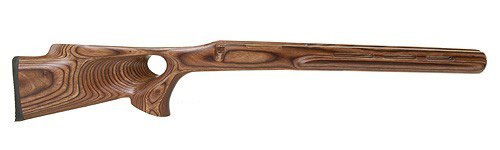
Some of the other stocks like HS Precision and McMillan were considered but ultimately didn't make the short list primarily because of price. They are great stocks but would not fit into the budget. Out of the above stocks the owner decided that the Choate Ultimate Varmint stock was most along the lines of what he wanted, and I thought it would be nice to get my hands on one to get a better feel of what they really are. So I ordered one up for this project.
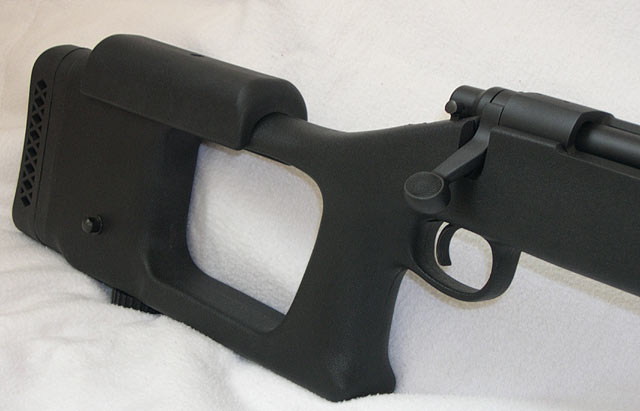
The Choate stock arrived and the first thing you notice is that it is thick... everywhere. The pistol grip area is thick, the forearm is thick, everything is thick, or perhaps "robust". Because the stock is injection molded, some reinforcement was required using aluminum, and the aluminum bedding block was installed. The end result is a robust stock with aluminum v-block that does not flex like most injection molded stocks. The forearm area is hollowed out and there is a huge barrel channel of about 1.25" all the way (no taper) and you can fit just about any barrel contour in there, though smaller contours would not look as nice with big gaps all around the barrel.
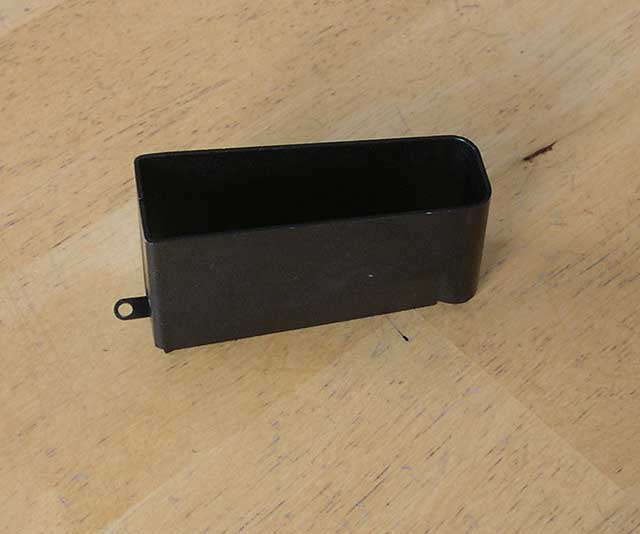
This stock is also available for the detachable box magazine 700's, but we did not have a DM rifle so we purchased the standard version that is setup for the Remington 700 ADL with no floorplate. Because it had no provision for the BDL floorplate you get with the SPS, I had to order an ADL box magazine that had the provision for the screw to attach it to the action. All 700 actions have the tapped hole for the ADL magazine, but the BDL's do not require attaching because the floorplate holds the magazine box in place. The ADL magazine box and the little screw (don't forget the screw if you are converting) cost a total of about $10. This box is required to make the rifle feed correctly from the magazine.
We now had the stock, and we needed to determine what barrel contour and length we wanted. The owner let me decide on this part and I knew I wanted something heavy, and ER Shaw has a 3.5 contour which is the equivalent to most #7 contours with a straight taper from 1.2" at the chamber down to .875" diameter at the muzzle. This is a nice contour, but I wanted to try something a little different and I decided on a #4 contour which is 1.125" diameter all the way from receiver to muzzle, making a straight bull barrel. I thought with the straight inlet contour of the barrel channel in the stock, that this barrel would look nice and would fill the channel. Of course, it should be very stiff and should help accuracy. The one downside is that it was going to be a heavy barrel, literally! To try and cut down on the weight, especially out front, I decided on a 22" length.
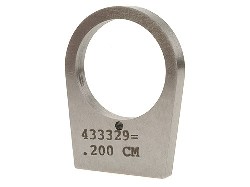
I planned to have the front of the action squared by E.R. Shaw, and with a new barrel and squared action, it would be a shame (and detrimental to accuracy) to put an un-square factory stamped recoil lug between the action and the barrel. If you know a machine shop that does surface grinding you can have them grind the factory Remington recoil lug to high tolerance, and you would probably save money. But for this article, I decided to make it easy and just ordered up a new .200" thick callahan recoil lug from Midway USA for $28. Any of the quality recoil lugs from Badger Ordnance, Tubb, or others will work great. I'm not a huge fan of the super thick recoil lugs, so I opted for the Callahan at .200" thickness. (Factory is about .181" or so). You can get a tapered or the parallel side ones like the factory. Some stocks will not fit a tapered one, so be careful.
I planned to use the factory trigger and adjust it myself, so nothing needed to be ordered there. But I did plan to use the spray on aluma-hyde finish again like on the sub $800 project. So a can of black aresol aluma-hyde II was ordered from Brownells for $15. Well, I believe that about covers all of the parts for this particular build.
Assembly
Well, obviously, the first part of the assembly is going to be the disassembly of the original SPS rifle. This is actually quite simple for the first part of the build. E.R. Shaw wants the trigger with the barreled action when they put on the new barrel. So all we have to do for this phase of the build is remove the stock, floorplate, and internal box magazine. With a Remington, that is all accomplished by simply removing the two screws that hold the floor plate to the action. It requires the proper size allen wrench, but that is all! Loosen and remove the two screws and then the floorplate will come out and the stock will drop free. At that point I normally will take a rag and clean up some of the oil that you'll see on the action and barrel, etc. During that wipe down, chances are you'll knock off the magazine anyway, but if you don't, simply squeeze and tug the internal magazine and it'll come off. In reality, you could probably leave the stock on and ship it to ER Shaw, but to make it easier on them and to allow me to ship it in a smaller container, I removed the stock. Now, if you do not plan to ship it in a hard container, I would recommend reattaching the floorplate with the box magazine (without the stock!) in order to protect the trigger during shipping. MANY triggers get broken during shipping and reattaching that trigger guard goes a long way to protecting it. You could remove the trigger also. That is accomplished by driving out the two pins that hold the trigger to the action, driving out the rear pin first, which then will drop the bolt stop and its spring. Then drive out the front one. If you do that, be sure to ship the trigger along with the action, and you would not need to ship the floorplate. Of course, you will also need to ship the bolt with the barreled action as well as your shinny new recoil lug (with written instructions to use your new recoil lug and not the factory Remington one).
Now, let us talk about that ER Shaw barrel order. They have a nice interface for looking at and putting together the specifics on their webpage but ultimately you will be talking to someone, as there is no ecommerce portion where you can pay for it. But that is okay, all the folks I have talked to over there have been very helpful and friendly. The biggest thing you have to plan for is the 18-20 week wait to have the barrel fitted to your action. Yep, 4-5 months. So, for a chrome moly #4 contour barrel of 22" length costs $150, and having the barrel fitted to your action will cost another $70, and this includes test firing, which is nice. The prices were actually a little cheaper for this build, as ER Shaw upped their prices for 2007, but I am including the current 2007 prices. Since they will have the action apart, and their prices are very reasonable, and we are building a precision tactical rifle, I thought it best to try and get some more accuracy out of the rifle and elected to have them lap the locking lugs ($50) and true the action face ($35). Shipping is another $24 to get it back to us. If you wanted to save some work on your part and spend a little more money, you could have them do a matte bluing for $90. They also have .250" recoil lugs for $35 and some other services. But, we had a budget to keep, so just the barrel, fitting, squaring and lapping please. Total cost including shipping is now currently $329. Again, I will stress that unless you have done it before and know what you are doing, do NOT attempt to mount a barrel yourself on a Remington 700 action. Your life could be in danger, headspacing is CRITICAL.
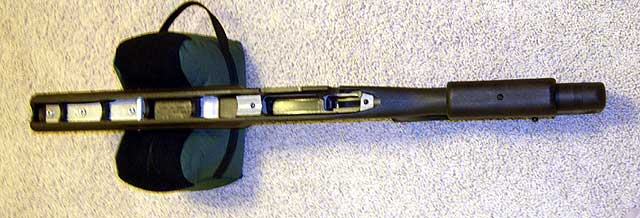
Let us roll forward about 4 months and take a look at our pretty new barreled action as it was returned from ER Shaw!

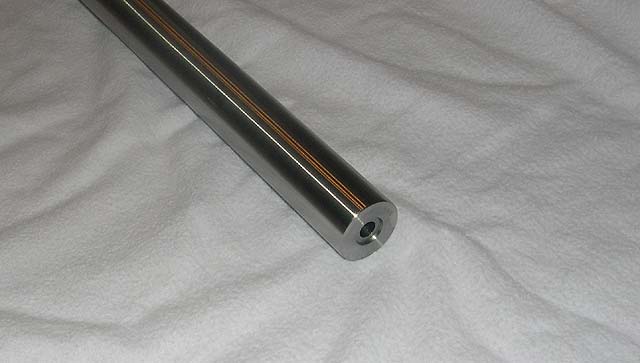
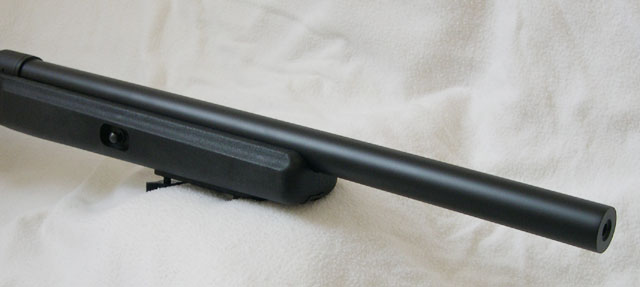
The barrel ended up being quite thick, and looks thicker than I expected. But it is the advertised 1.125" diameter and a quick test fit showed that it filled the barrel channel of the stock very nicely, and the shorter and fat barrel looks quite nice. The crown is nicely recessed and the barrel has a nice matte finish, which will help with the prep for aluma-hyde.
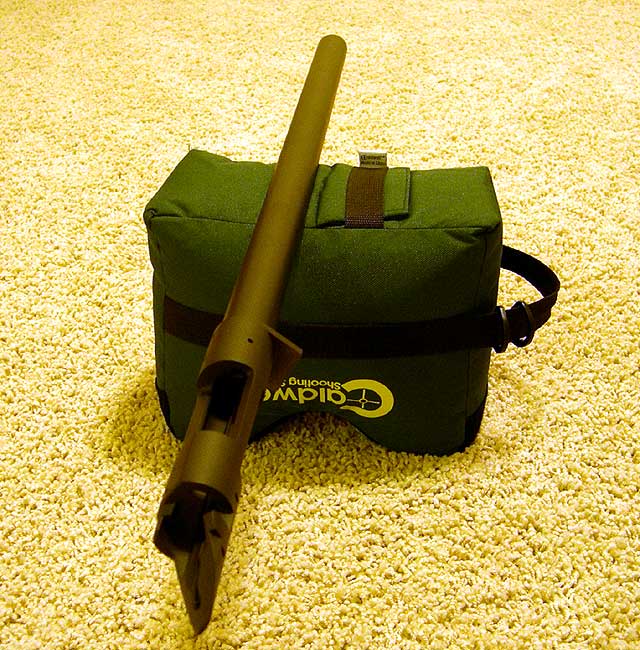
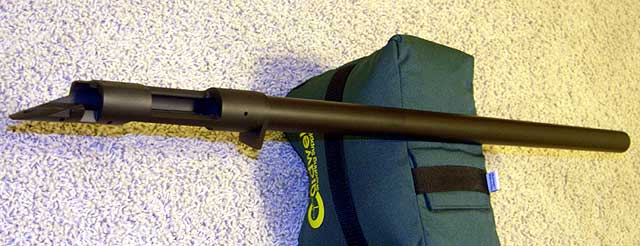
At this point, if the trigger is attached, which it probably isn't coming from ER Shaw, you will need to remove the trigger in preparation for metal paint (aluma-hyde in this case). At this point I am going to have cheese out and refer you to the sub $800 project for pictures and instructions on preparing and applying the aluma-hyde. The reason is because the weather turned cold and rolled into fall/winter and aluma-hyde requires warm temperatures for application and curing, and we do not get warm enough termperatures in Montana Falls and Winters. Instead of waiting six months, I cheated and applied teflon with an airbrush and then baked it in our teflon baking oven. Sorry about having to do that. But I will provide a few notes on preparation for aluma-hyde. The Barrel came with the typical fairly rough finish from ER Shaw which is good for Aluma-hyde to stick to. The matte finishes of the SPS actions also are good for the hyde to stick to. You have the option of leaving the bolt matte black as it came from the factory, or you could coat it also. If you do coat the bolt with the spray on Aluma-hyde, I would probably mask off the bolt lugs, as it comes out of that aerosol can fairly thick. I would also scuff up the muzzle of the barrel with some sandpaper or a wire wheel, as it is usually smooth and doesn't provide a good binding surface. Also, if you elect to paint the bolt, I would disassemble the bolt as outlined in the Remingon owners manual, though removing the firing pin from the shroud isn't easy with common tools, so you may have to leave that shroud factory black. Beyond that, follow my directions in the sub $800 article for degreasing and prep for the 'hyde, and you should be good to go. Here are a few pictures of the Teflon Coated barreled action.
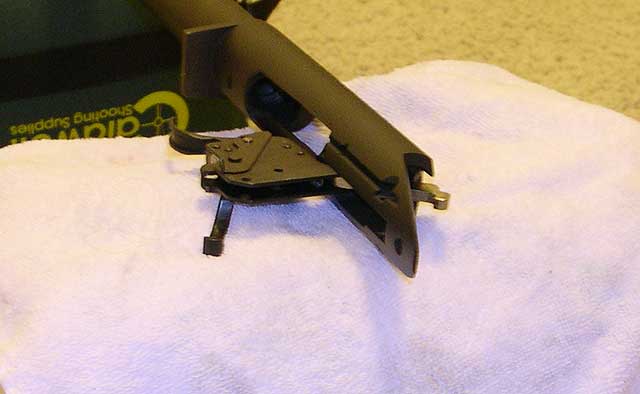
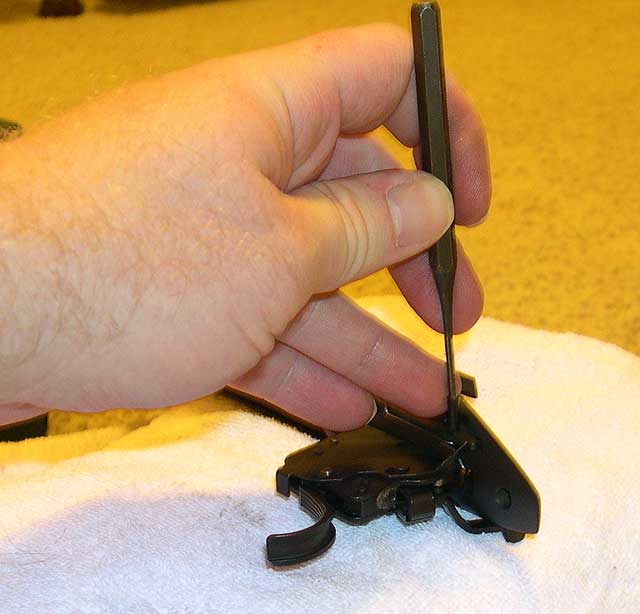
Well, with everything painted and all the pieces here, it is time to put this thing all back together. If you have not already, reassemble the bolt as outlined in the Remington manual. Now, we'll need to put that trigger back on. First, put the sear spring in its proper location in the trigger. The sear is the "silver" part on the top of the trigger that actually holds and releases the firing pin. The sear spring is the little spring that provides the upward pressure on the sear. There is a little hole, or recess, where the spring goes about 1/3 the way back from the front of the trigger mechanism, and under the sear. Once you have the spring in place, set the barreled action on its side (right side down) on a non marring surface. While holding the front of the sear in place in the trigger mechanism, put the mechanism in the barreled action, aligning the holes as best you can. Usually, it is easier to have the rear of the trigger assembly hanging down from the action. Now, take the shorter trigger assembly pin and get it started through the action and into the assembly and through the sear. You MUST do the front pin first, and it sometimes helps to drive the pin through the action holes before mounting the trigger assembly, this will help knock away excess metal coating that may have built up. Once you get that pin started (tapered end first) you can then take a punch and drive it the rest of the way. Insure that you drive it far enough so the top of the pin is flush, or a tiny bit below flush, you do not want any of it hanging above the surface, as it may cause binding on the bolt stop.
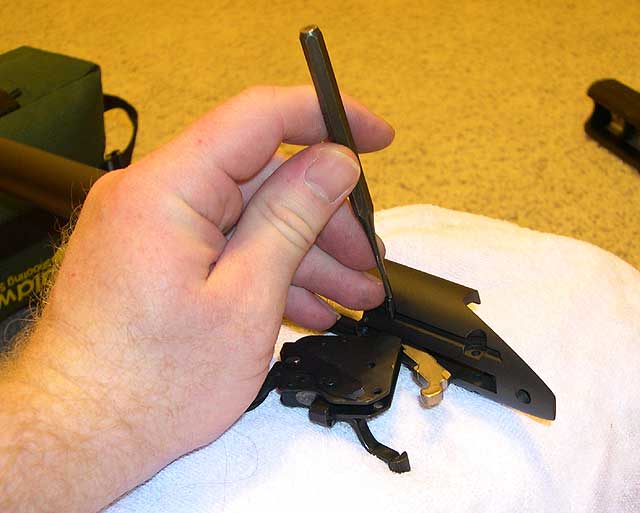
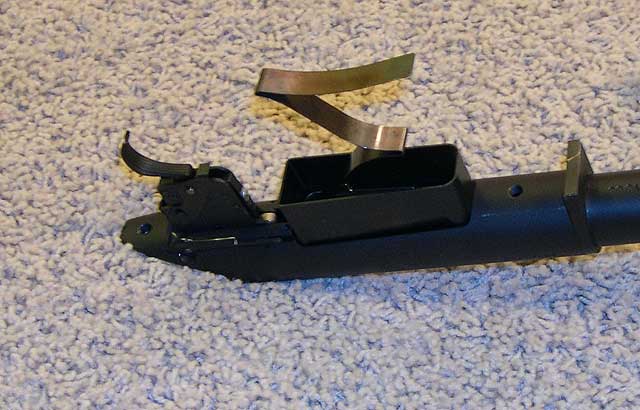
And a picture of the assembly swung down and the sear swung up to try and show where the sear spring is.
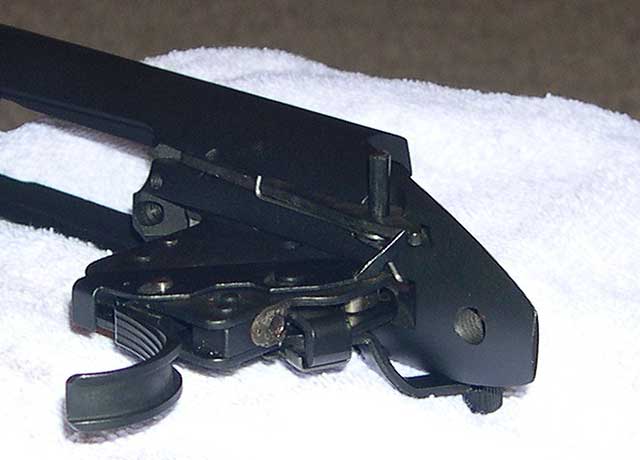
Okay, the first step is done! Now the hard(er) part. If you have a 3rd hand, now is a good time to use it! Okay, first and foremost, you better make sure that sear spring is still in place and not lost. Now, the best way I have found to do this is to take the rear pin (the longer one) in my right hand, then set the bolt stop in its place, and loosely set the bolt stop spring kind of where it belongs, all the while just leaving the trigger assembly handing like it was. Now, with your left hand, push and align the bolt stop and bolt stop spring in place while pushing the rear assembly pin down, hopefully grabbing and aligning the bolt stop and its spring. You only want to push the pin far enough to hold the stop and spring, but not too far that it wont let the trigger assembly swing up into place, if it does, just back it out ever so slowly until there is room, but its still holding the bolt stop and spring in place. Here is a photo of everything together and the trigger assembly swung up into place (but the pin not driven in yet) so you can kind of see how the bolt stop and spring are placed.
Now, the rest is fairly easy, just swing the assembly up into place, again insuring that the sear spring is in place, push down on the sear so that it lines up correctly to allow you to drive the rear pin in, and then drive it flush.
Well, by golly, I think we did it! But, we are not quite done. Remington factory triggers are a bit (sometimes a LOT) too heavy for good precision work. But luckily, the Remington triggers are easy to adjust. Now, I am going to offer a disclaimer here, the reason Remington sends the triggers out heavy (usually 5-7 lbs) is because of liability. Lighter triggers are inherently more dangerous because of accidental discharges. When adjusting a trigger, you MUST take into account what you will be using the rifle for. If it is a target rifle only used on a range, then slightly lighter trigger pulls should be safe. If you are working in the field, then in order to prevent accidental discharges, you should have a heavier trigger pull. Adjusting a trigger too light can also render a safety inoperable. All of that being said, Sniper Central and Remington will not be held liable if you elect to adjust your trigger as described in this article.
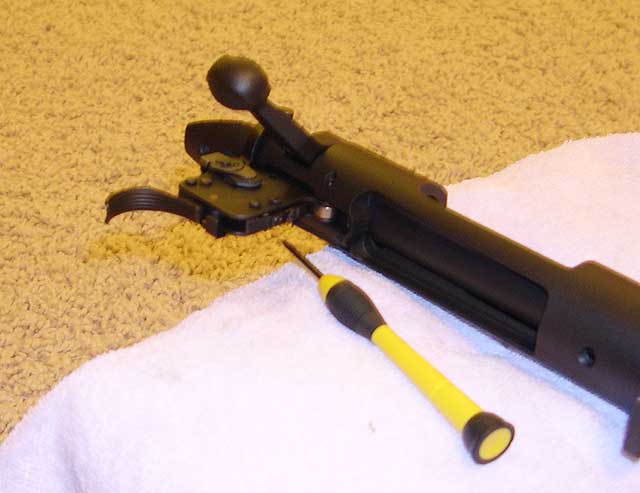
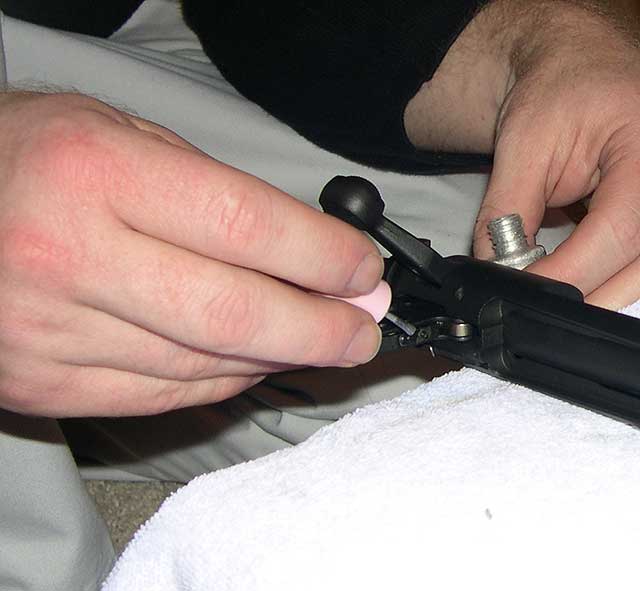
The Remington Trigger has been around for a long time in its current form, and its funny to think that when it first came out around 50 years ago on the 721, it was scoffed at and regarded as inferior because it was a self contained assembly and no easy way was available to work it in the traditional way that gunsmiths were used to doing "trigger jobs". But, it did allow the casual shooter the ability to adjust them on their own. The trigger assembly itself has three screws, two on the front, and one on the rear. The one on the rear is the Sear Engagement adjusting screw and is set from the factory, and is outside of the scope of a casual trigger adjustment, DO NOT TOUCH that rear screw unless you receive proper training. The front two screws are the ones we'll be messing with in this discussion. The top screw is the over travel adjustment and the bottom screw is the weight of pull adjustment. The two screws will have (provided it has not been adjusted before) a hard film over the top of them which is put there by Remington to prevent the screws from moving. In order to adjust the screws you will need to remove that hard film. It is usually fairly easy to remove with the same small screwdriver that you'll be using to adjust the screws. Generally, the only screw you will be adjusting is that bottom weight of pull screw. Once you have that plastic removed, you can back out (counter clockwise) the screw a quarter turn and then test the trigger. You can do this until the trigger is at a weight that you want. Normally I prefer 3.5 lbs for a rifle that will be used in the field, but you would need a trigger gauge to get an exact amount.
Once you have the trigger to what you think is a good trigger pull, put the stock on and run a safety test. First and foremost, insure the rifle is empty! Then, test the safety to insure that it prevents firing. Then with the safety OFF, try slamming the bolt closed rapidly several times to see if the rifle 'fires' (drops the firing pin, remember, the rifle is UNLOADED). If it does, you will need to adjust the trigger a bit heavier by turning the screw clockwise. Do so until it passes this test. The final safety test is to insure the rifle is empty (yes, again!) and leave the rifle on fire, and while holding the barrel, drop the rifle onto the butte from perhaps 2-3 feet or so and insure the rifle does not 'fire'. Remember, this is a field rifle, and safety to the operator and team is paramount. If it passes this test, then remove the stock, and use some paint or other hardening liquid and paint over the screws. Like the factory, again, this prevents movement of those screws. My daughters usually like it when I use their favorite finger nail polish!
Now that we have the trigger back on and adjusted to where we like it (and insuring its safe) we can start to put everything together and make a complete rifle. Because this is an ADL stock we will need to attach the magazine box to the action with the little screw. You need to insure that the front of the box with its tiny lip is all the way up and in place. This takes a bit of man handling because it is a tight fit. Once you get it "snapped" in place, go ahead and attach the screw through the tab. Now, take the follower and magazine spring and place them up in the action with the action upside down. There is a small recessed area in the bottom of the stock that keeps the magazine spring in place (combined with the magazine itself).
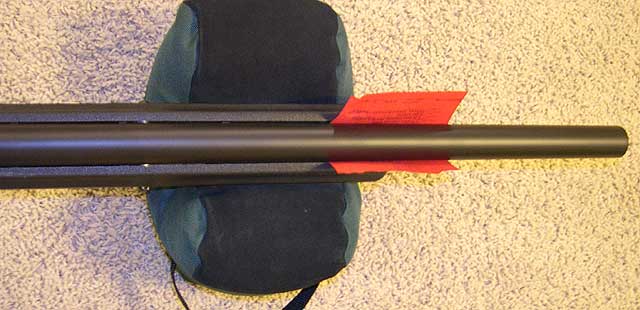
Now, lower the stock onto the upside down action and use the provided action screws to tighten it down. Choate says 55-65 in-lbs is what you want, and if you have a 65 in-lbs t-handle torque wrench, well, you can use it on the front screw, but the rear screw you will probably be out of luck! It requires about a 3" long allen wrench, and I have never seen a socket extension with an allen head that long. So, you can try to come up with an idea to use a torque wrench and get your 55-65 inch-lbs, or you can just use your hand and guess, like I did. I was not fond of having to do that, but my options were limited. With the stock firmly in place, it was time to flip her over, and check out the new rifle. The first thing I did was check the barrel channel and checked to see if the stock was touching anywhere on the barrel. I could see that the stock was slightly out of whack and the spacing was not the same on each side of the barrel, but there was enough room and nothing was touching, as the picture below shows.
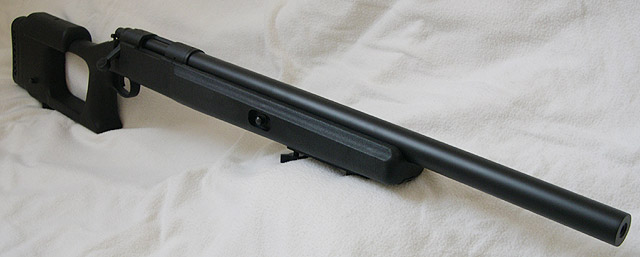
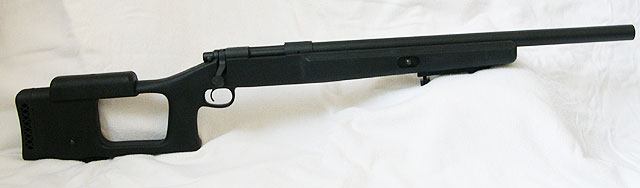
Well, a quick function check to insure that the bolt stop latch is not binding and everything was functioning as desired, and then we were done! Before mounting optics, I figured we better get some photos of the completed rifle and a few details of the stock. I think with the fat, but shorter barrel, mixed with the stock, it turned out pretty nice. Here is the final product.
Performance
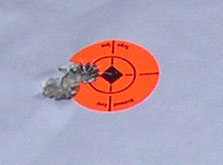
The owner of the rifle was also interested in optics, and we decided on a scope that I could review, and in turn give him a good deal on. I mounted a Burris Fullfield2 Tactical 6.5-20x50mm with the ballistic mil-dot reticule on the rifle and headed to the range. The rifle is fairly heavy, though I did not weigh it, but the stock is beefy and with that thick 1.125" barrel, there is some decent weight. But, it is well balanced and handled pretty well. The stock design does work and it is comfortable to shoot. Like I mentioned before, the stock is thick in everyway, but it is not too bad. I checked the headspace on the chamber before firing and I was pleasantly surprised that it was just right, with a nice tight closure on the 'go' gage and no movement down at all on the no-go gauge. Tight chambers usually help accuracy. Now, because one of the goals for the rifle was that it had to shoot better than it did before, and it needed to shoot sub .75 MOA, I figured I had better have a base line and I fired the stock SPS rifle when it first arrived months ago. For comparison, I would fire three three round groups, and use the average, and then also compare the ultimate tightest group the rifle shot, of course, using federal gold medal match ammo in both. The first two groups out of the SPS were about what I expected in the 1.5-2.0 range, but the third group threw me... it shot .880". That is pretty good for a sporter weight bottom of the line Remington 700! Of course, the pressure was on for the new build to really perform. The average for the three groups was right at 1.507". So, 1.5 MOA for the base factory rifle. Here are some pictures of the two best groups.
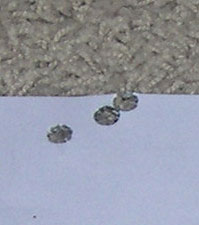
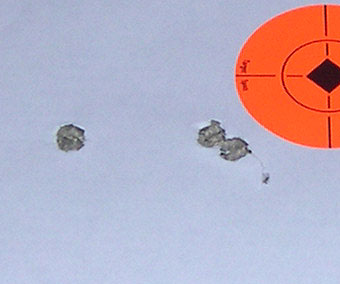
Jumping forward now to the finished rifle. With a brand new barrel, and no break-in (the same as with the original factory rifle) I fired my three groups. The first group on paper was an uninspiring 1.260", and I was really beginning to worry! But the worry was for naught. The next group was a very impressive .286"! Now that was more like it, and then the third and final group fired for the comparison was another very nice .318" group. Even including that first virgin group, the average for the three groups was .621", but this rifle is a sub .5 MOA rifle, and will probably even get better as the barrel breaks in. I fired some other groups for the scope review and for further testing and the rifle remains very accurate. Here are the pictures of the two best groups from the original first three:

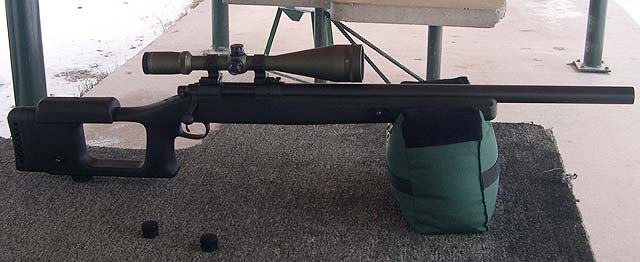
And of course, a picture of the finished rifle at the range
The rifle even performed better than I hoped and was a real pleasure to shoot with minimal recoil. It is a nice solid rifle, but now we have to look at the finances and see if we were able to stay under budget.
$410 - Remington 700 SPS
$329 - Barrel, Mounting, Action work
$175 - Stock
$28 - Recoil Lug
$20 - Misc (Alumahyde, new mag box)
$962 - Total
Hum, it looks like I blew the budget, and by a decent amount. We have a few options to bring the price down. We could shop around for a used ADL action to use, which would probably save us about $75-$100. We could also elect for a standard Bell & Carlson stock and save another $75. If you found someone to grind the recoil lug, or even use the factory one, you could save a little bit more. But, all that being said, I cannot tell you that you would get the same results if you used those other parts, though there is a chance you would. Of course, you could also sell the SPS floorplate for about $50 on ebay, and maybe even the stock and brand new barrel, all to help bring the costs back down. So I think there are ways to get the budget close to that $850, so I'll say it was not a total failure, it is still a very good rifle for $962, and is even custom to your specs!
While I am disappointed I was unable to make the budget of $850, I am still very happy with the performance of this rifle. It shoots great, well under .5 MOA, and it is a unique looking and easy to handle rifle. It was a fun project, though I think all rifle builds are fun in their own way, and I am glad I did it, and hopefully it gives some of you some additional ideas on what you can do for projects!